Category Archives: soup recipes

More of “Eat Your Veggies!”

I really love a hearty soup. Living in Colorado, our winters can begin in early October and last pretty much into May. I’ve come up with a lot of soup recipes over the years. I think of soups as perfect food: you can have you veggies, protein and carbs all mixed together in one warm, thick, hearty, delicious and satisfying meal. Soups can be very forgiving: you don’t have to follow soup recipes like a scientific equation. If you like the ingredient, it will play nice in the pot. As a mother, I’ve also found that you can pack extra nutrition into soups and fussy eaters won’t even know it’s there. Nutrition espionage at its finest.

Not stone soup!

I remember being in Kindergarten and Mrs. Rogers, our teacher, told us a story about stone soup. Her version was (and I’m not quoting her accurately here) there was a homeless man camping in the woods. He had no food and no one in the village was charitable enough to give him any. Some children came upon him in the woods. He had a campfire going and a pot of water boiling over the flames. Nowadays this story would never be told — who in their right mind would want their kids visiting with a hobo in the woods? Anyway, the kids asked him what he was making. He said “stone soup” —and he tossed a stone into the boiling water. He said the soup was normally extremely delicious, but this one was missing something. A few carrots maybe. One of the kids ran home and brought him carrots. He tasted the water and said, “I bet an onion would make this taste great.” So another kid brought him an onion. He tasted the soup and said, “something’s missing, I think some celery would make this taste even better…” and so on until the kids had brought him many ingredients and he finally had this masterful soup. Well, I just thought he was the cleverest hobo that ever lived! And the story has stuck in my mind to this day. My Kitchen Sink Soup always reminds me of this story.

I wasn’t planning to make soup this week. It has been sunny, glorious and at least 70° every day. Not exactly soup weather. But I had a few odd bits of vegetables left in the fridge from my excursion to Heavenly Harvest Produce a couple of weeks ago. I also had some leftover cooked veggies. None of them added up to a full serving. Tie breaker: I bought some pork neck bones for my dog as an experiment. She is on a raw meat, species-appropriate diet, and I’m always looking for something new and economical for her to eat. I hadn’t added too many different bones to her diet, preferring to stick with the ever-safe natural chicken backs from WholeFoods and an occasional pork rib. The neck bones looked meaty and the bones didn’t look too thick and hard. After opening the package I found only one I was willing to give to my dog, so I thought the rest would make a nice broth. That’s when I decided that soup was definitely going on the menu.

Yes, they are in my sink.

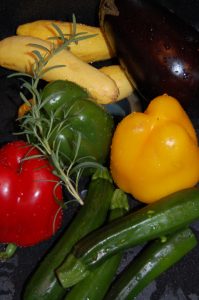
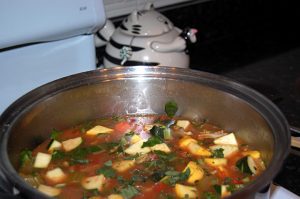
Like my Kitchen Sink Salad, the name comes from my tossing an odd assortment of vegetables in the sink for rinsing. I also consider the soup consisting of “everything but the kitchen sink.” Gotta keep an open mind. I start out with my typical basic soup base: a chopped onion, 2-3 ribs of chopped celery, a few cloves of chopped garlic and 2-3 chopped carrots. Sometimes I sauté them in super-healthy coconut oil, but this time I opted for extra virgin olive oil. I sauté these in a dutch oven until the onion starts to approach translucency.  At this point I added the pork neck bones, browned them just a little bit, and then added 8 cups of chicken broth. Since the pork was raw going in and I wasn’t going anywhere, I turned the heat way down and let it simmer for an hour plus. I added some salt and pepper at some point. When it looked “right,” I turned off the heat, moved the pork bones to a plate and left the pot on the stovetop to cool down. Once the bones cooled off, I stripped the meat off, put it in a separate bowl and placed it, covered, in the fridge. My son is a vegetarian and so to make life easier, I make one big pot of soup (he doesn’t mind broths, he just won’t eat meat) and keep the actual meat bits separate for my own dining pleasure.

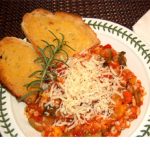
When I had gathered all the other ingredients I wanted to put in my soup, I turned the burner back on, starting chopping veggies and adding them to the broth as I went along. Once the pot was full, I let them simmer for about 30 minutes. I had some teensy alphabet pasta in the pantry and threw it into the broth to soften. When we were ready to have dinner, I put some of the meat bits into bowls and we served ourselves the hot soup. We grated some parmesan cheese on top and toasted and buttered some artisan bread for dunking. My absolute favorite is the rosemary bread sold at WholeFoods — not only is it delicious, but when you toast it the fragrance of rosemary fills the kitchen. It also makes heavenly croutons. My African Greys and our pet rat also got—and loved—some soup for dinner. What was left was given to the chickens who quickly cleaned their plate. There’s nothing so universal as good, healthy food.

This soup freezes really well too!

YOUR Kitchen Sink Soup

You are in charge, add whatever ingredients you like, or things in the fridge that you need to use up! Serving number and prep time are also up to you.
Course: Soup
Cuisine: American
Keyword: "everything" soup, soup recipe, vegetable soup

Ingredients

  • 2-3 TB Olive oil

Soup base

  • 2-3 carrots chopped
  • 2-3 stalks of celery chopped
  • 1 cup onion chopped
  • garlic to taste
  • 4-8 cups stock (poultry, meat or veggie); Better Than Bouillon will do if you don't have stock. Amount depends on how much you want to make

Soup Ingredients

  • Whatever you like or need to use up! Raw or cooked vegetables, meats; herbs such as oregano, thyme, parsley, bay; rice, pasta, beans or barley.
  • Season to taste. Since you may be using cooked veggies, keep in mind they already have been seasoned
  • A little grated parmesan on top is great!

Instructions

  • Sauté the soup base vegetables in the olive oil; once they soften a bit (10 mins?), add the stock.
  • Add the other ingredients of your choice and cook for 20-30 minutes. Cooked rice or pasta should go in last so they don't get mushy.

Sprouts: Little Leafy Buds of Super Nutrition

Yes, this post really is about gardening! Gardening doesn’t always involve the great outdoors. I’ll be posting about my indoor gardening experiences with LED lights in the future. And gardening doesn’t always involve dirt…

I sprouted seeds for the first time about 5 years ago. As I was researching nutrition for my African Grey parrots, information on the high nutritional benefits of consuming sprouts, such as this, kept coming up:

“Research shows that sprouts are a veritable fountain of youth. Sprouts abound with antioxidants, they are full of protein, chlorophyll, vitamins, minerals and amino acids. Broccoli sprouts have been found to contain 50 times as much of the antioxidant sulfurophane as mature broccoli. Wheat Grass juice is the closest substance to hemoglobin, and is therefore a phenomenal blood purifier and liver de-toxifier. Sprouts contain enzymes, giving your body a much needed rest as they digest themselves – invigorating you while requiring no help from your body to process them. New research indicates that peanut sprouts reduce harmful cholesterol and that sunflower, buckwheat and grain sprouts dramatically improve the quality of life for diabetics. The list goes on and on.” Quote courtesy of http://sproutpeople.org/

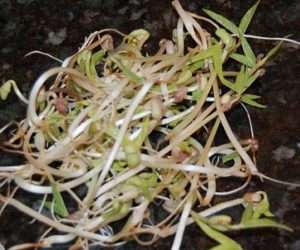
I’d been buying sprouts at the grocery store for better than than 20 years thanks to a fabulous veggie sandwich recipe I’ve been enjoying, but it never occurred to me that I could grow my own. I bought a sprouting cup, sprouted some wheat berries, and offered them to my parrots. They wouldn’t touch them. So I nibbled on the sprouts myself and put the cup away for a few years. Then came our first winter with chickens on board. I wanted to provide them with some sort of nutritious greens since there was nothing left out back for them to forage.

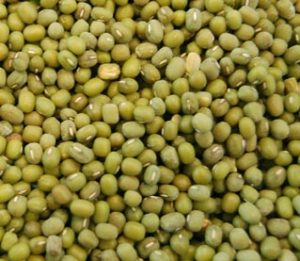
I started with wheat berries, since I already knew they loved wheatgrass. It was an instant hit! Next I tried mung beans, the beans that make the Chinese bean sprouts you buy at the store. They loved them too–and so did I! I realized that I could sprout mung beans for my own home cooked Asian dishes and not have to settle for pale, lifeless and often slimy sprouts sold at grocery stores. We love sunflower seeds in our salads, and I thought sprouted sunflower seeds would be even better. I buy shelled raw sunflower seeds for my homemade bird food mixes and thought they wouldn’t sprout as they were shelled and possibly damaged. Not so! They sprouted beautifully and we had another winner!

Just today I decided that I needed to have more than one sprouting container going at once, so I could have continuous sprouts available. I ordered two more sprouting cups, the Easy Sprout Sprouter, from Amazon.com, plus some broccoli seeds because I’ve heard so many amazing things about them, such as this article Broccoli Sprouts Fight Cancer by Dr. Mercola.

So… what’s involved? I’ve been buying wheat berries and mung beans in the bulk foods aisle at Wholefoods. I’ve seen some health food stores selling small packets of these items for outrageously high prices and am constantly amazed that people buy them. You can buy wheat berries, mung beans, raw shelled sunflower seeds, etc. in the bulk aisles of many health food stores for just about nothing. Look there first!

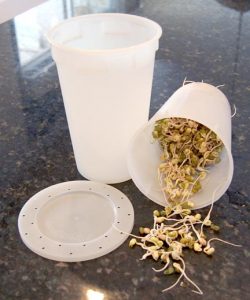
You need something to sprout your seeds/beans in. I chose the sprouting cup because at the time it was all I could find. After viewing what Amazon has to offer, there are many, many more options out there today. But for this post, I’ll stick to what I know. The white food grade plastic sprouting cup holds about 4 cups of content. There’s an outer cup and an inner one that has drainage holes in the bottom. It comes with an extra bottom with smaller drain holes that fits in the inner cup (in case you’re sprouting really small seeds), a dome and two flat covers — one solid, one with breathing holes. Oh, and a guide that gives a LOT of specific information on how to use the cup.

Three days.

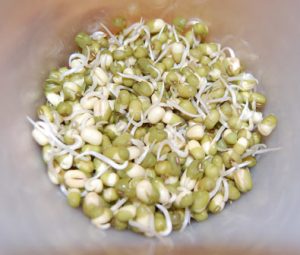
I’ll use mung beans here for my example. On day 1, I put about 1/3 cup of mung beans into the coupled cups and add some filtered water (twice as deep as the beans), add a lid and let them soak over night in a cool, dark place (my kitchen counter works fine).

Next morning, I lift the inner cup out of the outer cup, dump the greenish water, and rinse the beans well with fresh filtered water. Later in the day I rinse again. By this point they’re already soft and starting to sprout! You can munch on them at any time, but with the mung beans you may also want to keep them growing until they’re a couple of inches long so you can use them in recipes.. I rinse and drain 1-2 times every day until the beans are being eaten because it’s so dry here in Colorado.

Keep a close eye on the freshness of your sprouts — you don’t want them to get moldy and smelly. Keeping them rinsed and drained, and at a reasonable temperature, keeps them fresh and healthy. Once they grow to the size you want, you’ll want to put them in the fridge so they don’t get moldy.

I’ll update this post with my broccoli sprout experience some time in the future. For extensive information on sprouting, and to purchase just about anything related to sprouting, visit this web site  http://sproutpeople.org/. They know EVERYTHING about sprouts!

Veggie & Sprouts Sandwich

Prep Time15 minutes
Course: Sandwiches
Cuisine: American
Keyword: Sandwich
Servings: 1 person

Ingredients

  • 2 slices your favorite bread toasted
  • 1/8 cup fresh sprouts
  • sliced avocado
  • sliced tomato
  • sliced cucumber
  • 1 tbsp your favorite salad dressing or mayo My favorite is a zesty Italian dressing

Instructions

  • Toast the bread, slice the veggies, assemble in amounts to your taste. Enjoy!