
I have a friend who started a small ranch-based combination animal rescue/learning environment for people with brain injuries (and at-risk youths). From her web site, Hope Farms Project (yes, I made her web site):
“Inspired by her son who suffered a stroke before birth, Lisa is committed to offering children, youth and adults with disabilities an opportunity to live up to their fullest potential. She believes that nature, nurtures. Lisa’s personal experience watching her son grow and heal in nature with animals has motivated her to leave the political job she loved and pursue her passion for animal-assisted social work. Hope Farms Project is the result of that decision and she has never looked back.”
 I’ve been volunteering my graphic design services to Hope Farms whenever I can and have also helped in her garden. This year she got the great idea of teaching homesteading skills to her students and asked me if I would do the honors. She knows I’m a bit of a jack-of-all-trades, make a lot of things from scratch and have a few homesteading skills myself. I jumped at the opportunity!

Homesteading students
Classes will be held the first Wednesday of the month and so the first one was April 6. The theme was sewing, the first project was to make a 12″ pillow. I thought it would be nice if I chronicled the classes here and it would give me extra things to write about. This was a good project to get the students familiar with a sewing machine, sewing by hand, using a pattern and how things “go together.”

Sarge waiting for his new pillow…
Learning how to sew at an early age has been the basis, I think, for many of my other skills, having used the knowledge to do things like build fences, tile my kitchen splashboard, design my own clothes and inventing a fabric pet-related product that I had sold on the internet for five years.
I’m trying something new with the project instructions: I’m using a plugin designed for recipes for the instructions! I think WP Ultimate Recipe would be pleased. You can find my instructions here:
Pillow Making, a Beginner Sewing Project
 Here's a little project that can be put together in an hour or less. The size of the pillow is your choice. The instructions here are for a small (12") pillow.
Note: You can print these instructions, the instruction photos will not print.
Here's a little project that can be put together in an hour or less. The size of the pillow is your choice. The instructions here are for a small (12") pillow.
Note: You can print these instructions, the instruction photos will not print.Ingredients
- sewing machine
- 1 - 13" x 13" pattern (optional) This can be made from printer paper, newspaper, etc.
- 3/8 yard fabric
- 1 pkg batting/stuffing
- 1 spool thread & needle
- several straight pins
- 1 pair scissors or rotary cutter
- iron (optional)
Instructions
- Fold fabric in half, right sides (outside of fabric) facing together.
- Optional: Make a 13" x 13" template/pattern out of paper, pin or weigh down on your folded fabric and cut (two pieces). Otherwise, just cut two 13" x 13" pieces of fabric.

- With the two pillow pieces still right sides together, pin them on all four sides.
- Sew seams on 3 full sides of the pillow with the sewing machine, 1/2" in from the edges. Partially sew the 4th side, leaving an opening large enough to fit your hand into.

- Trim corners to an angle (a little bit, make sure you don't cut the stitches). This will keep the corners from bunching up when the fabric is turned right-side-out.

- Reach into the pillow, grab the far end and pull it through the hole -- turning the pillow right-side-out. Push out corners by sticking a finger in them.
- Optional but helpful: Iron the pillow flat, folding the unsewn seam edge to the inside. This will help you later when you hand-sew this last opening closed.
- Stuff pillow with the batting. You can make it as full (firmer) or loose (softer) as you want.

- Pin the opening closed with straight pins.
- Hand sew the opening closed. That's it, you're done!

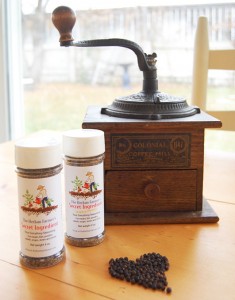 People often ask me what seasonings I use to make my foods taste so great, so today I’m sharing my secret ingredient. I call it, no surprises here,
  I’ve even had friends joke that it makes a great sachet for the underwear drawer and will also do in a pinch to melt snow off the driveway… but enough of the jokes. This seasoning has become my ~
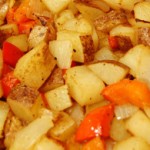
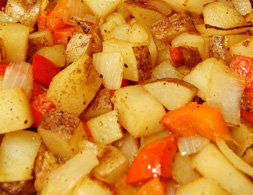 This side dish is delicious, satisfying and easy to make. It's also a great camping dish since you can do all the prep at home. This goes especially great with grilled trout. It can also be served as a meal, just add some protein (ham is good) and cheese at the end. It's also a VERY good breakfast dish paired with eggs.