I admit that the holidays bring out the Grinch in me. I’ll spare you the details. For the past two years, my teenaged son and his girlfriend took it upon themselves to decorate our house, which was great. But this year I’m left to my own devices. My son’s in college and busy with friends and a new girlfriend and not so interested in spending much time around our house. He has his own apartment. I didn’t want to totally not decorate, I’m not ready for that. But I’m just not into it. Not so much.
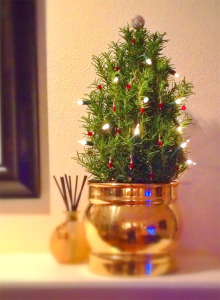
I did put up a wreath I’d made a few years ago, opened the rustic cabinet that houses our hand-painted Christmas village and pulled out the stockings for the mantle. I didn’t want to mess with a tree, but kept seeing these cute little tree-shaped rosemary plants. I love rosemary but have a hard time keeping it alive. But, I rationalized, if I bought a tree it would also die. At least I can eat the dead rosemary. So I bought one!
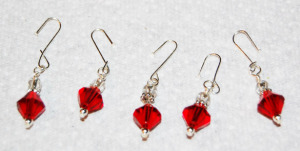
But how was I going to decorate this little cutie? I looked in a few craft stores for little Christmas ornaments, but there were none that were quite small enough or pretty enough. I did find a 7’ string of white Christmas lights, battery operated, for $2 at Hobby Lobby. Perfect! I finally got the idea to make my own earring-like mini-ornaments, using my jewelry-making supplies. They’d be small and light and I could make them look any way I wanted. Yes! I bought a string of red Swarovski crystals that were on sale for half price and would make due with whatever else I had at home.
I have to say it turned out really cute, and I have the satisfaction of having made them myself, feeling like I came to a great compromise and having the only tree on the planet decorated like mine. How’s that?
Here are step-by-step instructions on how I made my little ornaments.
A. Two pairs of needle-nose pliers, or one each needle-nose and one round nose (B) pliers (mine also have a wire snipper in the handle).
B. 1-1/2” head pins. These are silver plated. You’ll need twice as many as ornaments you’ll be making–half for the ornaments, half for hangers.
C. Your choice of findings & gems. Here I have small silver beads, snowflake spacers, some white glass and red crystal beads.
Instructions (click on the photos for larger views)
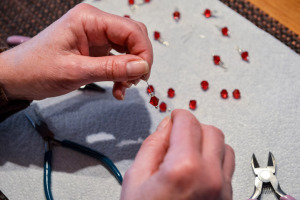
1. Add your beads/findings to the headpin. I used one small silver bead, a red crystal bead, a snowflake spacer and the white glass bead.
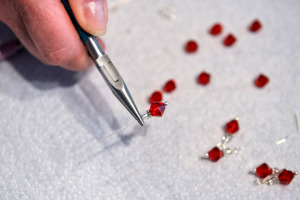
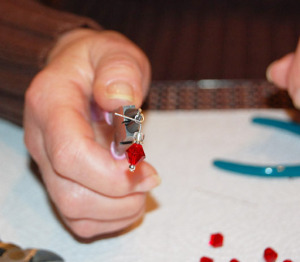
2. Using the needle nose pliers, grip the head pin horizontally and close to the last bead. Try to use the narrower end of the pliers—this will make a shorter stem that the pin end will later be wrapped around.
3. Using the thumb on your other hand, flatten the end of the pin over the pliers (a 90° bend) to make the stem.
4. **Change your grip on the pin: Let go of the stem and turn it 90° so that now you’re gripping the stem on the long bent side.
5. Bend the stem end over the rounded top of the pliers to make a half-circle.
6. **Change your grip on the pin again: Slide the pin off the top half of the plier and move it down to the bottom half.
7. Now curl the pin around the rounded bottom of the pliers to make a complete circle (round loop).
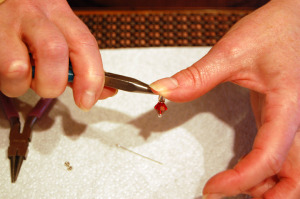
8. Grip the loop by the pliers and with a second set of pliers begin to wrap the pin end around the stem. You can probably get 2-3 good wraps out of it. Sometimes the pin will break at this point, if you are twisting it or pulling too hard. That usually means you’ll have to start over. You may also end up with a little bit of the pin that you can’t wrap. You can either snip it off, or use the pliers to flatten as best you can.  These are not really jewelry, so they don’t have to be perfect.
9. I took the rest of the head pins and twisted them into sort of figure eights, to be used as hooks.
So I guess we have a Christmas tree after all. Rose-Merry Christmas I guess! If I don’t want to use these next year, I suppose I can make them into earrings and give them to my 12 closest friends, lol.





Very cool Deb. I love Rosemary, it’s great with food and all. But mostly for me it’s the smell, so wonderful.
Thanks John, I’m with you there! I usually add a good amount of rosemary to my sourdough bread, it works like a potpourri when I make toast. 🙂