This has to be the easiest and cheapest project I’ve even undertaken. And the results are the most comfortable skirts I’ve ever worn! They are like wearing your favorite sweats, but even better. Truthfully, they’re like wearing nothing!
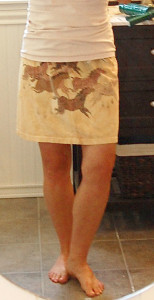
These skirts are made from (men’s) t-shirts. I had a medium shirt that someone gave me a few years ago which I never wore. I’m really not a t-shirt kind of person because they are so shapeless and bulky. And this one was too big, but I kept it because it had horses on it. Men’s tee shirts can be bought for almost nothing at places at Goodwill or Saver’s. They are not necessarily “ABWs” either (Already Been Worn), if you’re squeamish about wearing some stranger’s pitted-out clothes. Too many people buy things they never wear, but thankfully eventually donate them.
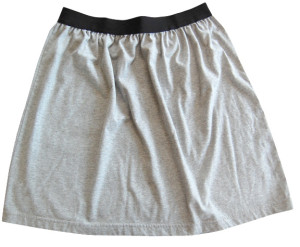
Trying to decide what size shirt to buy depends on your body size, how long you want the skirt to end up being and whether you want it form-fitting or flouncy and gathered at the waist. My men’s medium fits me comfortably, the XL grey one is longer and is more gathered. Both are cute, comfortable and equally easy to make.
What you’ll need:
• A sewing machine and thread;
• One men’s t-shirt, your choice of size;
• 1-1/2” wide elastic;
• Scissors (or my choice, a straight edge, rotary fabric cutter and cutting board);
• Some chalk or some other marker;
• Straight pins.
Instructions:
[NOTE: Click on these photos to make them larger so you can actually see something.]
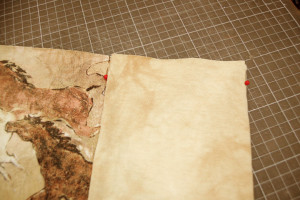
1. Cut straight across the t-shirt, right under the sleeves. The t-shirt bottom is now your soon-to-be skirt.
2. Mark, with pins, both sides and front & back centers of the cut edge of the skirt top. Mark equally between these four pins, for a final total of eight. Folding the skirt pin-to-pin makes marking the centers fast and easy, without the need for actual measuring. They don’t have to be that precise.
3. Cut a piece of elastic the size of your waist, overlap the ends about 3/4” and sew, flatly, together.
3. Place, with chalk or other marker, 8 equally spaced marks along one edge of the elastic. The easiest way to do that is lay the elastic flat on a surface and mark both sides. Fold in half and mark in the folds (front & back). Repeat the folding and marking to mark the spaces between the marks already made. Did that make any sense?
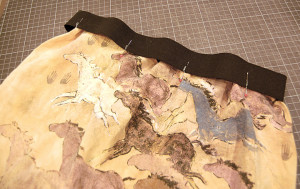
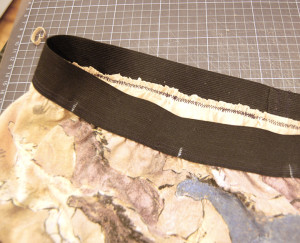
4. Pin the elastic to the outside of the skirt top, matching the pins with the chalk marks. Overlap the elastic at least 1/2” over the fabric.
5. This is the only slightly-tricky part: You need to sew the elastic to the skirt top, which is bigger than the elastic. All you need to do is grab the elastic/fabric in front of and behind the sewing machine needle, from one pin to the other, and stretch the elastic until it’s the same size as the fabric.
It may take a little practice, but you’ll get used to the process quickly and will sew the elastic and fabric together within 2-3 minutes. In the photo you will see that my machine has a double needle. I JUST discovered this little gem and it’s my new favorite thing! The double needle automatically adds stretch to your stitches and a perfectly even top-stitch like you see on jean seams. Love!
6. That’s it. You’re done. Unless you want to clean up the inside of the fabric where it rests against the elastic. Use your scissors to trim any unevenness that may offend your sensitive need for perfection. And now enjoy what will become your favorite skirt!
Could that be any easier? Feel free to email me with any questions.

