Polyface Farms, Farm to Consumer Legal Defense Fund

A few short weeks ago I won a raffle. It was the first time in my life that I’d won something. The raffle was for a trip to Staunton, Virginia for the Farm to Table Legal Defense Fund‘s annual Food Freedom Fest. Included in the activities were dinner with bloggers Jenny McGruther from Nourished Kitchen and Sarah Pope from the Healthy Home Economist, a full day of speakers explaining the Defense Fund’s cases and a full day’s tour of Joel Salatin’s Polyface Farms.

Thursday Dinner with the Bloggers

Jenny, Sarah, Me

Thursday night’s dinner at Zonodoa with Sarah and Jenny was a real treat. It was so thrilling to meet two very well-known and successful bloggers that spoke my language! We talked a little about real food and enjoyed a delicious and healthy meal in an elegant but comfortable setting. We parted company early—tomorrow was going to be a big day of speakers, discussions and updates regarding the defense of farmers’ basic right to farm.

Friday Farm to Consumer Legal Defense Fund Presentations
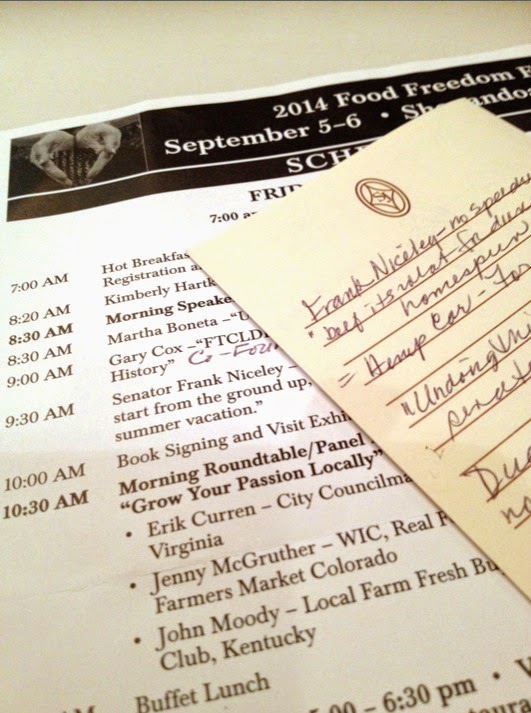
Notes!

Prior to that weekend, I’d been only slightly familiar with governments’ (Federal, State and local) heavy-handedness with farmers’ rights. I’d heard about how some large corporations were using their money and clout to get their own way to protect their financial interests.  I’d also heard about armed raids on dairy farms for selling raw (unpasturized) milk and FDA’s position that we have no rights to choose what we consume unless they GIVE US PERMISSION: “Plaintiffs’ assertion of a ‘fundamental right to their own bodily and physical health, which includes what foods they do and do not choose to consume for themselves and their families’ is similarly unavailing because plaintiffs do not have a fundamental right to obtain any food they wish.” Oh, just tell me I don’t have the right to make my own decisions about my body and my health, and you will light a fire under me that will be seen from outerspace!

The  information conveyed that Friday by a wide variety of speakers, lawyers, senators, representatives and farmer/victims, was a real eye-opener for me. They spoke of raids on food clubs where ALL the beautiful, organic, locally grown food was confiscated and dumped in landfills because some raw milk was found on the property. Farm animals being confiscated and destroyed without testing for a disease they “may have” had (they didn’t), then additional litigation on conspiracy charges when that didn’t hold up in court. Businesses being closed due to never ending bureaucratic red tape based more on principle than law. The USDA’s recent solicitation to carry sub machine guns (what?) for their raids on farms.

Just one example of who is fueling the fire: “… raw milk in particular has drawn a lot of regulatory scrutiny, largely because the politically powerful dairy industry has pressed the government to act.”

Downtown Staunton

All of the cases and stories were presented in a matter-of-fact manner, with stats to show the progress that the Legal Defense Fund has made since its inception on July 4, 2007. The stories flat out flabbergasted me, but the sincerity and positive attitudes of all of the speakers were very encouraging. I ended up Saturday’s lectures with an even greater appreciation and respect for the real farmers in this country, who just want to provide us with healthy, unadulterated, real food and not be forced to cave in to the depraved ideas being accepted by the general public (with our government’s blessings) as the acceptable production of food. I left the lectures feeling informed and wanting to become involved in some way to further the cause that Legal Defense Fund represents. There was a block party and BBQ Saturday night in downtown Staunton. I was tired and it was kind of loud (a sure sign of being over-tired for me) so I stayed for a while and then trekked back to my room at the hotel. My tomorrow (Saturday) was to be spent at Joe Salatin’s Polyface Farms.

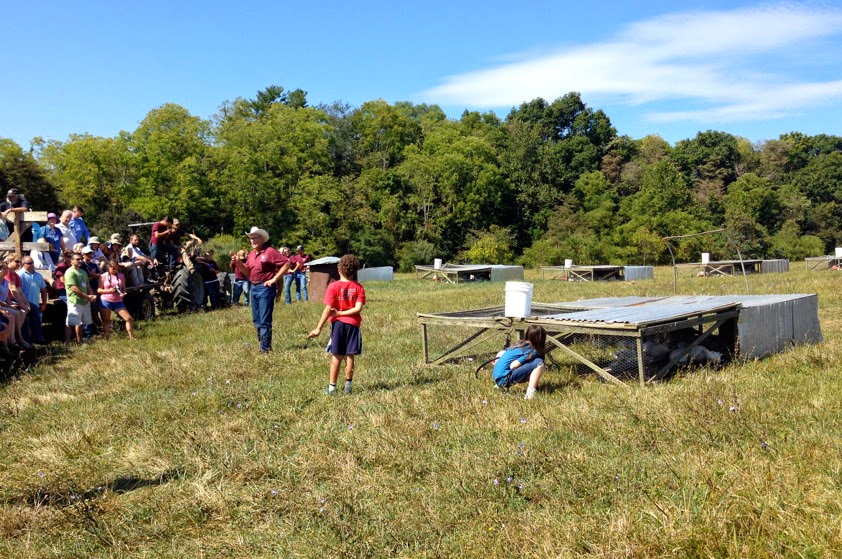
Broilers on the range.

Saturday at Polyface Farms

While my Maps printout said Polyface was only 20 minutes away from my hotel and the directions seemed straightforward enough, I have to admit I was not sure I was going where…and when…I was supposed to. But luckily my phone was still getting some bars and even though I was the only person on the back country roads at the time, I put my faith in my phone and found my way to the farm. During the last 5 minutes of my trip I ended up with a few cars following my every turn. Later I found out that many people had become totally lost and arrived at the farm as much as an hour late.

Free range turkies

Chickens

Sprinklers of runoff water

Polyface is, to me, a picture-perfect farm. Virginia is so beautifully green and lush and this farm is a perfect example. There’s the house, small store, an outdoor covered area for meeting and eating, a few hoop houses, some gardens and then those gorgeous acres and acres of grassy hills. We had a Polyface breakfast and then were loaded onto two hay bailed trailers. We spent the better part of the hot, sunny day visiting various areasof Polyface.The smaller, cleverly designed chicken tractors are reserved for the broiler chickens. Moved daily, the chickens have access to meal food and water and also some sun, shade and pasture for foraging. Ducks, turkeys and laying hens also have portable grazing areas with easily moved electric fencing. The fences are to keep predators out. Pigs have the same fencing, but their free range areas include trees that provide them with shade and acorns and lots of places to root around. Cattle are moved from pasture to pasture daily, so they don’t overgraze the land. Snow melt-off that would have only flooded the land and been wasted is collected in ponds, to be used during the summer to water thirsty land. Winter accommodations for the cattle provide later forage for pigs, which in turn provides manure to fertilize the land grazed during the summer.

The entire farm is an economical and balanced ecosystem that supports itself, without the need for any artificial fertilizer, seeding or feeding. It’s all so NATURAL. The question of the day was “why doesn’t everyone do this?”

Hog heaven

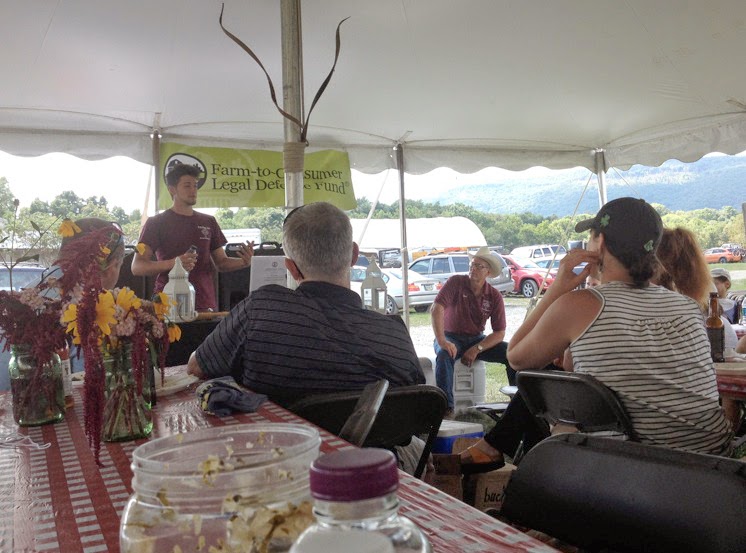
After our enjoyable tour of the farm, we were treated to a Polyface lunch. At the end of our lunch, a few more speakers came up to talk about food and farming. Joe Salatin brought a few of his substitutes for hired help: young farmers-to-be that spend time at his farm as interns and apprentices, learning his methods and bringing his wisdom back to their home states to carry on hisnatural farming techniques.Seeds of change for a better future. The young speakers were all very enthusiastic and passionate about being a part of change in this country.

I left Polyface Farms that day full of hope that the small farms in this country, and informed and involved consumers, will turn the direction of our food producing practices away from destruction of the land, nutrition, and mistreatment of animals, to cooperation and harmony with nature. Wow, what a beautiful alternative.

Leave a Reply

Your email address will not be published. Required fields are marked *

Easiest No Knead Sourdough Bread Ever!

This is the easiest—and best—bread I’ve EVER made. Seriously. I mean seriously, I’m so excited about this recipe!

einkorn sourdough bread

If only you could smell this!


I’ve been experimenting with sourdough (no added yeast) bread for about a year now. I tried the “no-knead covered casserole” method before, without terribly exciting results. In my previous post, I wrote about the two day method I’ve been using to make two loaves of bread-pan sandwich style bread. I’ve been happy with the results but it takes a bit of work and planning.

jovial einkorn flourA few weeks ago I found out about Jovial einkorn wheat and flour from the leader of our new local chapter of The Weston Price Foundation. Having a little bit of gluten sensitivity and intrigued by the heritage of this ancient wheat, I tried my recipe using this less complex, easier-to-digest wheat. It didn’t rise as much as what I’m used to and although the bread tasted great, the loaf was kind of small.

I re-worked my old no-knead recipe using einkorn rather than regular organic flour and it had great texture and flavor, but it still produced a smallish loaf. I have this great, economical, Ikea 3 quart cast iron covered casserole, which I bought at IKEA for about $40 (take THAT Le Creuset $300 casserole!). The next time around I added about 50% more of the ingredients and it turned out even better! The NEXT time I even simplified the process more by skipping TWO steps and was blown away at how perfectly easy this recipe had become. And, this bread is to die for! So, here we go:

Easy Einkorn No-knead Sourdough Bread

einkornSmallThis recipe is especially great for people who work full time -- it takes 10 minutes in the morning to throw this together and then it's ready to bake 8 or more hours later. I use Ikea's 3 quart covered casserole for baking. Here's more information about sourdough starter.
Prep Time20 minutes
Cook Time1 hour
Total Time9 hours 20 minutes
Servings: 1 3-1/2 lb loaf

Ingredients

  • 1 cup proofed/bubbling sourdough starter
  • 6 cups Einkorn flour
  • 2-3 cups room temp filtered water
  • 1 tbsp sea salt
  • 1/2 tsp citric acid totally optional!

Instructions

  • In a large bowl (preferably with a lid), add the flour, sourdough starter, water and salt and mix until blended. It should be a gluey thick batter, a little thicker than brownie batter.
  • Cover and let it rise in a warm spot for about eight hours, or until bubbly and doubled in size. In the winter, I prefer to turn my oven light on and keep the bowl in there.
  • Once the dough has risen sufficiently (8+ hours, depending on ambient temps), remove it from the oven. Place your empty covered casserole in the oven and set the oven temp 450° F.
  • Once temp is achieved, remove your casserole from the oven. CAUTION: HOT HOT HOT! Remove the lid and gently pour the dough into the casserole, being careful to not disturb too many bubbles. Cover and bake for 60 minutes. PLEASE NOTE: You may have to experiment with bake time due to altitude differences.
  • Remove the bread from the oven and remove lid. After 10-15 minutes: dump the bread out of the casserole, place on a cooling rack and allow it to cool completely before slicing and serving. I usually leave it on the counter over night (in a plastic bag, to soften the crust) and cut it in the morning with a meat slicer.

Notes

This recipes makes a 3.5# artisan loaf that will knock your socks off! This bread is beautiful, crusty, fragrant and due to using einkorn flour, has a rich nutty flavor. Don’t forget the Kerrygold!

Leave a Reply

Your email address will not be published. Required fields are marked *

Making sourdough bread without added yeast

I recently had a few people ask me how I make my sourdough bread, so thought I’d just post about it and then just send them here to read it. That’s one way to get some traffic to my blog!
Before I get started, please know that I AM NOT A SOURDOUGH EXPERT. I’m sure there are plenty of web sites that share everything there is to know about sourdough. Cultures for Health is the first that comes to my mind. I am only reporting my own personal experiences here. So, here goes…
Almost 25 years ago I had bought some starter from Jedediah’s in Jackson Hole. I didn’t realize you had to keep feeding it and it died pretty quickly. Over the years I’ve tried to make my own starter from potatoes or whole wheat with dismal results. Finally, last year I discovered Cultures for Health, which has become a great resource for me. I’ve bought other fermenting cultures from them and their live chat support is unbeatable! I bought their San Francisco Sourdough Starter and have been trying various recipes, hoping to find one that I could follow time after time and have reasonably reliable results.
Asiago-Sourdough loaves
What’s so special about sourdough bread? Sourdough starters typically contain acid resistant wild yeast and a host of lactobacillus bacteria. Lactobacillus bacteria are responsible for the sour taste in sourdough. The acid produced by lactobacillus lowers the pH of the dough, which in turn makes it a more hostile environment for other types of bacteria resulting in a longer shelf life—sourdough bread doesn’t get stale as quickly as commercial yeast breads. Also, the sourdough pre-digests gluten and other proteins in flour, making them easier for us to digest. People with gluten sensitivity may not react to sourdough. More information about sourdough, compared to it’s less natural cousin commercial yeast, can be found in this Weston Price article.
Now before I get started, be forewarned that since sourdough is a living organism, many things can affect the outcome of the bread. Temperature and humidity are the biggest challenges I’ve had, as the bread will ferment and rise quickly in a warm kitchen, too fast in a hot kitchen and dreadfully slow when it’s cool. Also, flour measurements are estimates only! When I moved to Colorado from Florida I quickly realized that the moisture content in flour varied drastically! If I used the same amount of flour called for in a recipe that worked in Florida, here in Colorado it would make a dry, hard loaf because the flour itself was much drier. So use your instincts, become one with your dough, and all will be well Grasshopper.

You can download a PDF of the sourdough recipe and instructions here.
What you will need:
Roughly a cup of fed sourdough starter
Bread flour, preferably organic, about 6-8 cups
1/4 c. butter (+ 1 tsp for buttering pans)
2 TB sugar
1 TB salt
1 tsp citric acid (optional, for extra sour taste)
2 c. grated Asiago cheese (optional)
3 TB chopped fresh Rosemary (optional)
Plus:
  • A nice large bowl (see my comment at the bottom of this post)
  • 2 bread pans
  • A glass or metal bowl or some other oven-proof container filled with water, to keep in the bottom of your oven, if you live in a very dry climate
What you will end up with: Two gorgeous, delicious loaves of possibly the best bread you’ll ever eat.
Bare-bones Instructions:
Day 1 – Feed (activate) the starter that has been dormant in your refrigerator.
Day 2 – The first rise, 3-4 hours. Then add other ingredients, knead until ready, separate into two loaves. Second rise, 2-4 hours. Bake 40 mins at 375°. Eat.
Basics:
Starter in a jar.
Day 1
Put about 1 cup (or more) of your sourdough starter in a large bowl and feed 1/2 c flour, 1/2 water every 3-4 hours. You should feed a minimum of 3 times, 4 is even better, before attempting to make bread. More info here: Feeding Sourdough for a Batch of Bread.
Day 2 – Morning
Bubbling starter in my favorite bowl.
Add 2 cups of flour and enough water to starter to make a thick slurry, the consistency being between brownie and pancake batter. Let sit loosely covered, in a warm place until it doubles in size and bubbles, about 3-4 hours.
Day 2 – Noon-ish
Add the other ingredients to the starter and mix in by hand. Then start adding flour, 1/2 cup at a time, until it can no longer by mixed by hand. This should be after adding 1-1/2 to 2 cups. Dump the dough onto a floured counter or other smooth surface and start kneading in flour a small handful at a time. I have a stainless Graham Kerr/ Galloping Gourmet pastry scraper which helps with this process, as well as with cleaning dough off the counter during cleanup. Keep adding flour until the dough barely sticks to the surface. Don’t add too much, it should be as soft as possible.
Done kneading!

Knead dough for 10 minutes or so, then do the windowpane test (see my video below). If it doesn’t pass the test, knead for another five minutes and repeat the test. Keep doing this until your dough gets a passing grade. Let dough sit for a few minutes while you butter the pans.

Ready for 2nd rise.
Cut the dough in half (you can weigh it if you feel the need), knead each loaf for a minute or two to get a nice smooth shape. Place in buttered pans, smooth some more butter on the top to keep it from drying out. You can sprinkle some Asiago on the top if you like. Place in a warm place (again, my oven) and let it rise for 3-4 hours, until it’s just above the pan edges.
Day 2 – Late Afternoon
Meat/Bread Slicer
Place bread pans in oven, turn oven on to 375° and once the oven tells you it’s reached the right temperature, bake for 40 minutes or until bread is brown and sounds hollow if you tap on the surface. Remove to a rack and cool for about 10 minutes. Dump bread out of the pans and leave on rack to cool. They may have sweated in the pans, you just want to dry them out evenly. Once completely cooled, the bread can be sliced and frozen. We bought this meat slicer recently, as a friend in Europe sends us organic cured meats every year, but it has turned out to be a fantastic bread slicer!
Learning Opportunity: I was photographing my most recent bread for this post. It was an extremely hot day, we didn’t get the air conditioner going and I was working on a DIY home repair project that took most of my attention outdoors. So sadly I let the bread rise too much. That caused the bread to “collapse” during baking, so the beautifully rounded bread at the left ended up flattening out a little in the oven. It’s not picture perfect, but I decided to proceed with this post as is to demonstrate that sourdough bread is extremely forgiving. It wasn’t as pretty as it could have been, but the texture and density of the loaves were still gorgeous and the flavor is fabulous. I’ve even undercooked my bread once, put it back in the oven 15 minutes later and baked an extra 15 minutes and the loaves were great!
I have to say, if you make this bread with rosemary and asiago cheese it will make your kitchen smell like freshly baked bread every time you toast it. Please do it justice and slather it with a high quality butter, such as Kerry Gold, and you will be in bread heaven.
Extra note on cleaning your bowl:
One of the hardest things about making bread is cleaning the bowl. I bought two of these really cheap, flexible plastic 6 quart salad bowls at a party store about ten years ago.

They look like cabbage leaves made into a bowl, and have been the best bowls for a LOT of things. For sourdough cleanup, I just leave the dirty bowl on the counter over night, until the dough dries out. Next day I just have to flex the bowl and most of the dough just flakes off. I pour that in the trash, and use a dry veggie brush to scrape off the remaining bits of dough. Whatever is left behind, I wash with soap and water. That prevents me from (1) clogging up a sponge with dough, (2) clogging up the kitchen sink drain and (3) fighting with fresh, gluey dough. These bowls have been the best ones for mixing salads, making sauerkraut and other fermented veggies. Very little investment and yet priceless!

Another Note: You can use your sourdough started for more recipes than just bread, such as crackers, pancakes, pizza dough. Check out this Cultures for Health page.  You can also dehydrate and the freeze some of your starter, so if you ever have an oops and kill your starter, you’ll have a backup in the freezer.

Windowpane test: Stretching a piece of bread dough to see if it’s done being kneaded. You should be able to stretch the dough to the point where you start to see light through it. If it breaks rather than stretching, you should knead for five minutes more and try again.

In a week or so I’ll be experimenting again, by using mostly freshly ground Einkorn flour. There’s a lot of good buzz about Einkorn out there, it sounds pretty exciting!

Leave a Reply

Your email address will not be published. Required fields are marked *