|
| A few ways to preserve foods. |
I’ve been so busy putting food up that I haven’t had time to write. This is going to be a long post, but extremely informative as well! So, here goes…
As a kid, I remember our basement being full of canned tomatoes, pickles and peaches. The basement always smelled like dill and garlic (and mold, we’re talking about Jersey after all), the colorful jars lined up on metal shelves. We always had more than we needed.
 |
| Time to put on an apron and dig in! |
Later as an adult I tried my own hand at canning. It was a long, hot and arduous process. I shopped for the best vegetables at farmers’ markets miles away from home; cleaned and prepared the vegetables, jars and lids; cut and cooked vegetables and washed and boiled the glass canning jars and lids. The the hot filled jars would go into a boiling vat of water. Due to Colorado’s high altitude, I had to increase the boiling time quite a bit to ensure bacteria-free food. The extra boiling time turned them to mush and probably killed off whatever nutritional value they originally had. I could also only can high acid fruits and vegetables safely (again, because of the altitude) and so restricted myself to peaches, tomatoes, jams & jellies, various pickles and pickled beets. After reading in my canning book about Botulism (Putting Food By), I never felt completely comfortable eating what I preserved, despite all the care I put into the process. When I moved 15 years ago, I sold all of my canning paraphernalia and gave up on the idea of preserving foods.
Yet, I garden, therefore I am. I want to provide my family with real, healthy and organic food. And at times we have more vegetables than we can eat. I end up giving a lot away. I really wanted to find practical ways to preserve my fresh, organic foods so we can still be eating them during the winter. I started looking around for new ideas, and these are what I came up with. If you decide to try any of these preserving methods, please do your research and follow instructions and recipes from reputable books or web sites. If not preserved properly, food can spoil and even kill! A great resource I found this summer is SB Canning. There you’ll find loads of information about how to can, great recipes and the author will even edit your favorite recipes to make them canning-safe. Here we go:
Ball Jar Freezing of Foods
Although pressure or water bath canning is my favorite way to preserve food, this summer I discovered “freezer safe” Ball jars. I made a batch of green chili, then some chicken, beef and pho stock and most recently tomato soup, poured them into pint jars and froze them. What a great thing! The pints are a great size and stack really well. To get the frozen contents out I put hot water into a pot in the sink, set the jars in (without the bands) and let them sit until they can be slide out of the jars. I love these jars so much I’m thinking of throwing out all our old plastic storage tubs and replacing them with the jars. Also since I’m not using the lids to “seal” the contents, they can be washed and reused. The glass jars are airtight and the contents don’t get freezer burned like they do in plastic.
Cellaring or Root Cellaring Vegetables
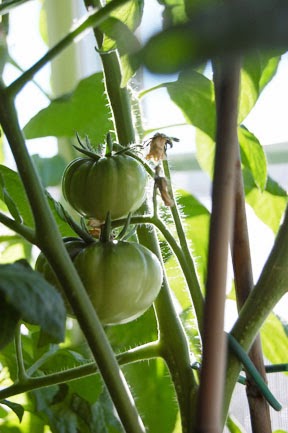
My parents used to harvest all our green tomatoes at the end of the season, pack them between heavy layers of newspaper and keep them in shallow cardboard boxes in our chilly covered cellar door well. Not all of them survived, but a lot would very slowly turn red so we could have “fresh” tomatoes well into the winter. Once in a while we’d pull a few out of the basket and put them on a window sill in the kitchen to finish the ripening process.
In the past I’ve kept butternut and acorn squash in my basement, but they were gone by December because they were so incredibly delicious. You can also keep root vegetables such as turnips, beets, potatoes, etc. this same way. The secret is storing them in a cool dry area with very little temperature fluctuation, which with modern housing is harder than it sounds. But it’s an ancient method of food preservation and still a good one.
Culturing Foods
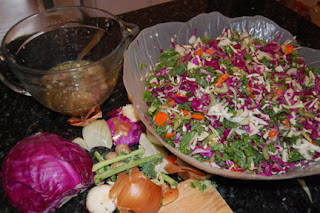
Last year, thanks to an article on Dr. Mercola’s web site , I learned about cultured vegetables. These are raw, cut up vegetables that are fermented with naturally present lactobacillus (good) bacteria for a few days, or weeks, in a crock or glass container at room temperature. When ready, they can be processed in canning jars (this will kill the cultures) or kept safely in the refrigerator for months. I think it’s a great way to preserve some the fresh organic vegetables I grow all summer that can’t be frozen or canned. I found this cultured veggie recipe and made a couple of test jars. DELICIOUS! Not only are the vegetables raw, which preserves their nutrition and crunch, but they are loaded with probiotics which is great for the gut and digestion, and the culturing process makes the nutrients and minerals super absorbable for our bodies. It’s also extremely easy to make and if you grow your own vegetables, costs about nothing! These folks were showcased in a couple of Dr. Mercola articles and are out of stock quite often, even at about $18 per jar! Recently I bought The Complete Idiot’s Guide to Fermenting Foods, written by Wardeh Harmon. It’s a great book containing lots of information on how nutritious cultured foods are, the science behind it, and loads of recipes I can’t wait to try. I’ve also been making milk kefir, water kefir and sourdough and will try making my own Kombucha and butter next. Food culturing is a natural way to preserve all types of foods, probably as old as mankind, and is an excellent alternative to canning.

I’ve also made sauerkraut, dill pickles, kimchee and green beans using the culturing process and they turned out delicious as well. A couple of friends have tasted my mixed vegetables and begged some jars off of me, validation that they are tasty for sure!
Basic Freezing
Last year I tried freezing a few things from my garden. My sour cherries did will. Apples turned to brown mush. Tomatoes tasted horrible when defrosted — sort of over-ripe/spoiled tasting. The apples and tomatoes went straight from the freezer to the compost. What a shame! The National Center for Food Preservation web site is an amazing resource for information on how much time vegetables should be parboiled prior to freezing. I did make a couple of jars of stewed tomatoes at a time there were not enough to warrant dragging out the pressure canner. The stewed tomatoes are delicious and I’ve already used a jar to make a pot roast last week. I used this recipe, but omitted the sugar. I also made several baggies-full of pesto with all the basil I had. This is my favorite pesto recipe.
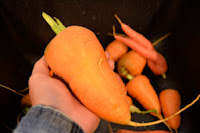 |
| Now that’s a carrot! |
There are some things that supposedly freeze well, such as green beans, broccoli, carrots, cauliflower, collards, peas, summer squash, lima beans–the things you’ll normally see frozen in the grocery store. Tomatoes freeze well only if made into a sauce or stewed. All fruits and veggies need to be washed, cut and parboiled before freezing. Herbs can be chopped and frozen in water in ice cube trays.
Basil can be made into pesto.
Pressure Canning
This summer I broke down and bought a pressure canner. The pressure canner took the “fear” out of preserving at high altitudes, doesn’t turn food to mush since processing time is so much shorter, and can also be used to cook meals when not being used for canning. I still have to make altitude adjustments but it’s not too bad. Once I had my routine figured out, it ended up being an efficient process and took little time. I found a great tomato sauce recipe and was able to can a dozen pints fairly quickly. And yes, she really means 6 bulbs/heads (not cloves) of garlic. I also canned a few jars of apple sauce and apple slices, so I won’t be throwing apples into the compost pile next spring!
Air Drying
My son and began air-drying some things a few years ago. I grew a stevia plant this summer, and it ended up being huge. I pulled it up by the roots, rinsed it under fresh water, tied some twine around the base of the stem and hung it up-side-down in the pantry. It’s dry now and ready for me to grind the leaves to powder in the food processor or just drop a leaf into a hot cup of tea. My son is drying mint, lavender and lemon balm for teas. We also have garlic hanging in the pantry. Fuss free preservation.
Dehydrating
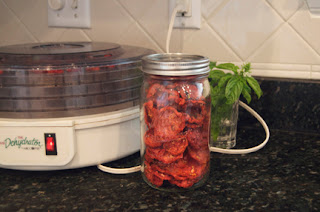
I had a batch of tomatoes that were not quite ready to can when I made my sauce. These extra tomatoes were ripe a few days later and there were not enough of them to can. I washed and sliced them, sprinkled with a little garlic salt and laid them out on parchment in my old trusty dehydrator. I’ve gotten so much use out of my dehydrator! Now, after 20 years, the plastic is cracking a little but it’s still in working order. Previously I would spray the plastic shelves with Pam, but still had trouble getting the food off. Smearing olive oil on the trays works as well. Parchment adds a little expense but it’s definitely a great solution as well. I’ve recently discovered Reynolds Wrap Pan Lining Paper. It’s parchment with a foil backing so you can “shape” it to fit different surfaces. I just rip off a length to fit a shelf in the dehydrator, press it over the shelf to make an impression, and cut out the shape with kitchen scissors. I’ll be using my dried tomatoes to make pesto, which I will freeze in baggies and use through the winter. I keep any leftover dried tomatoes in a Ball jar in the fridge for other recipes. I even use them in salads during the winter and spring since I can’t stand “fresh” store bought tomatoes. But they mysteriously disappear around here: tomato chips. You can also dehydrate kale, broccoli leaves, kohlrabi leaves — probably more.
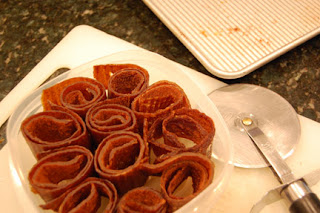 |
| Fruit rollups |
Since the parchment worked so well with dehydrating tomatoes, I decided to try using it to make some fruit roll-ups. Our apples were badly damaged by the June hail storm and have been falling off the trees for weeks. I gathered up a few pounds of the ones that had some good flesh on them, washed them and cut out the best chunks. I put the good apple chunks, skin and all, into a big pot, splashed in some lemon juice and about 1/2 cup of filtered water and set it to simmer for about 45 minutes (until the apples were soft). When they were cool enough, I pureed small batches in a food processor and poured them back into the pot. They simmered, uncovered, for 1-2 hours until they were the consistency of frosting and a nice caramel color. Using a spatula, I spread the apples about 3/8″ thick and as evenly as I could on parchment covered dehydrator trays and sprinkled some cinnamon on top. By the end of the day we had beautiful deep gold fruit bark, which I cut up and put in a container in the fridge. It’s supposed to keep for up to 6 months, but the first batch I made was gone in a couple of days. Not a speck of added sugar and it tastes like the most delicious apple pie!
You can also dehydrate foods in your oven, but I prefer the dehydrator because the heat is consistent, it doesn’t heat up the whole kitchen and I can use the oven for other things while the dehydrator merrily hums away on a counter. I’ve wanted to try stringing up apple slices to air dry, but that will have to be next summer since my apples are such a mess.
I think I’m done preserving for this season. I have some carrots I picked today, which I may dice, parboil and freeze. I may even make some carrot soup and freeze that. I’m curious how long it will take me to use up the vegetables and fruits I’ve preserved this late summer and fall. My ever-evolving garden project will contain a different variety of vegetables next summer, maybe geared even more towards what I can preserve for use throughout the winter. I have this idea that next summer I want to challenge myself to being totally self-sustained (no trips to the grocery story) for a month, just living off what is growing in our garden and what has been preserved through canning and freezing. I can see me upping the ante in the next few summers to stretch out the month to two, and then three… Of course living in Colorado, with such a short and dicey growing season, really makes more than that challenging. But then I love a good challenge!

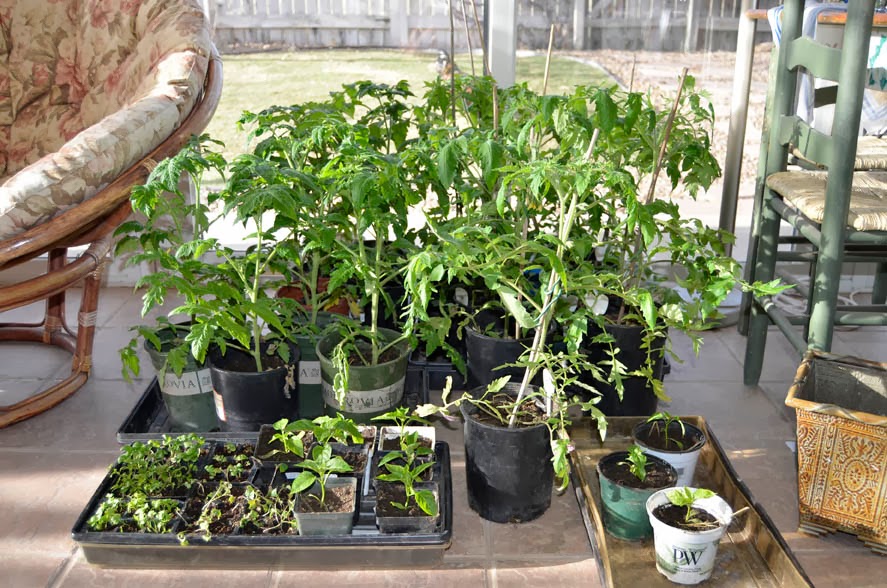

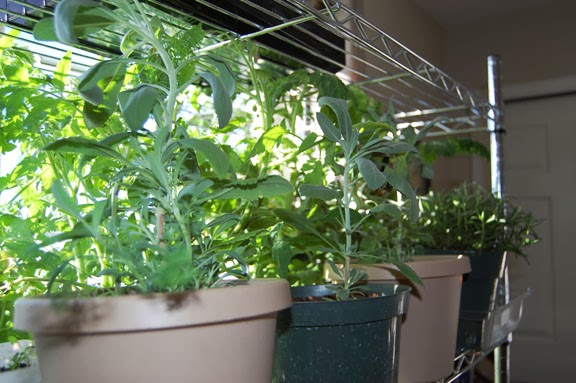 This fall I decided it would be a fun experiment to try to make it through the entire winter growing tomatoes and herbs indoors. I wish I’d started earlier, like maybe in September. But I didn’t get things planted until after Thanksgiving. I started with the typical little plastic seed packs and seed starter mix. One each of three different types of tomatoes: Costoluto Genovese, Brandywine and Roma. Some basil, dill, parsley, oregano and sage. Rosemary from the store. I also started some white sage, which I never had luck germinating previously.