Hoops before covering
The short answer is “you betcha!” This is my second year of using a hoop house. Last year we just put hoops over one raised bed. I used a plastic drop cloth as the covering and I wasn’t completely thrilled with it. During sunny days, even if it was cold outside, the house would get incredibly hot because plastic doesn’t breathe. But I planted a couple of weeks earlier than advised and all went well.
By the end of summer, the stowed plastic had begun to disintegrate. I had left it outside within quick reach just in case I had to cover the garden during one of our frequent summer hail storms and plastic just isn’t meant to be out in the sun. But the hoop house was successful enough to be encouraging, so we built a second one.
 After doing some internet research, I found this Agribon cold weather row cover cloth that was recommended by a few different sources. I ordered it last winter in anticipation of getting an even earlier planting going this spring. Our “last frost” date here is May 16 and still there are no guarantees. But I decided, after looking at the extended forecast for my area, to throw caution to the wind and plant a whole month early. Crazy! I got busy planting.

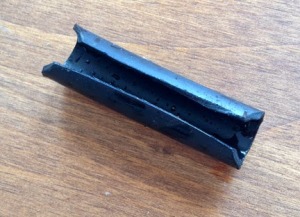
Clips in use.
After a week or two we had a few nights that were expected to be near freezing, so I pulled the fabric over the hoops and hoped for the best. The new fabric clips we’d made from sprinkler pipe worked extremely well and it was quick and easy to cover and uncover the gardens. They made it through those chilly nights without a problem.

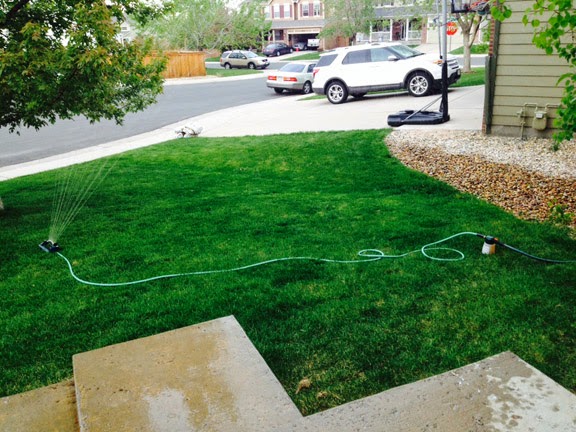
That lumpy thing is a hoop house!
Then came Mother’s Day. Forecasts for a winter storm were being broadcast for days. First for 2-4 inches of snow. Then 6-8. Then 9-12! I decided to double my row cover fabric “just in case” and made sure none of the plants were touching the fabric on the inside. As a last resort I tried covering the whole thing with plastic, thinking the snow would slide off of it and prevent too much weight on the cloth. Not! For some reason the snow was sticking to the plastic worse than it was to the cloth, so again I ditched the plastic and hoped the fabric would stand up to the heavy spring snow.

Cozy inside!
I did go out a couple of times during the worst of the snow storm to brush off accumulating snow. I was concerned about the strength of the fabric since I’d had my fingers punch through it a couple of times while pulling it over the hoops. But the fabric is amazingly strong despite it’s flimsy gauze-like appearance. A few times I peeked in and warm air puffed out in my face. Apparently the soil in the raised beds had warmed up enough during the previous weeks to keep the inside temps nice and cozy.
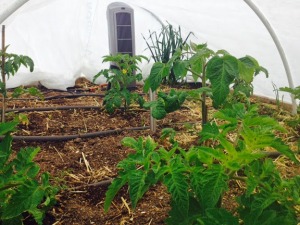
Space heater = toasty!
The next morning I woke to 10″ of snow and drifts up to about 18″. The hoop houses had some snow on them from over night, but still they stood their ground. I think the snow actually helped insulate the beds a little more. When the sun came out later in the day, the snow began to melt and roll off. The plants inside were still warm and safe inside. And dry!
The next couple of nights were supposed to go down into the 20s, and I didn’t want to take any chances. The fabric is rated to 28° and with a double layer I probably got another couple of degrees, but why tempt fate? I put an electric space heater in the house with the tomato plants and figured the other one with broccoli, onions, shallots, etc. would tolerate the cooler temps without extra help.
Two nights with temps around 24-28° were not a problem! Early in the mornings I’d peek into the houses and the tomatoes had actually started blooming! The heater kept the house so warm that I had to make sure I got out early to turn it off before the sun added even more heat.
I am definitely a fan of hoop houses after this year’s experiment. It’s now the end of May and after dodging a few hail storms my garden is waaayyy ahead of where it normally is this time of year. Maybe this summer I won’t have to wait until July for tomatoes!
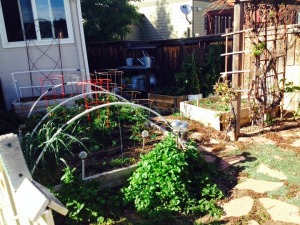
A head start on summer!
Next year I plan to put the hoops on a rail so I can just push them back and forth as needed. I’m also keeping the hoops up and the fabric in a convenient place this summer so if I see those green hail clouds headed my way I can run out and get things covered. It will be interesting to see how well the fabric will hold up to hail and what size hail will “break the camel’s back.” Keeping my fingers crossed that won’t happen!