There’s no question that bone broths are all the rage these days. And with good reason! You can find plenty of articles explaining that nourishing bone broths, rich in protein, gelatin and minerals, are soothing to the gut and healthy for bones and joints. For someone recovering from surgery or illness that needs to be on a very light or liquid diet, bone broths are the perfect food.
I’ve always cooked a lot, and tended to buy a lot of chicken and beef stock, bouillon or boxed broths. If you buy the organic and free range kind, it will be on the expensive side. Plus, they always taste watered-down. They can also have too much salt and added “natural flavorings” which usually end up loaded with free glutamates. And then there’s the issue of the extra containers to recycle.
A couple of years ago I started making my own bone broths and they were not completely economical. To make chicken stock, I would buy a couple of packages of chicken backs and one of chicken feet at WholeFoods–not known for the most reasonable prices. Sometimes I can find these at Asian Markets, for a better price. For beef, I’d end up at Sprouts as their beef bones are only $2-$3 a pound, compared to WholeFoods at $6 a pound.
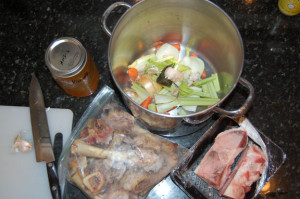
Then one day I got the idea that if I started saving ALL the bones from the meals that we eat, I wouldn’t need to buy much—if any at all—from the store when it came time to make stock. So, I now keep two large plastic bags in the freezer for bones. One is marked poultry, where I keep duck, chicken and turkey bones. The other is marked meat, where I keep beef, lamb and pork bones. I never buy boneless/skinless anything, so the bones add up fairly quickly.

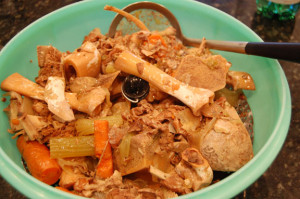
You can see the bones are depleted, starting to break down and the vegetables are now drained of flavor and vitamins.
Putting together the ingredients in the stock pot is a breeze. I just throw in chunks of onions, carrots, celery, garlic, add vinegar, toss the bones on top, and then fill with enough filtered water to cover everything by an inch or two. Once the water starts to simmer, I find the “sweet spot” on the burner knob that will keep the water simmering but not boiling. I will cook poultry stock for 24 hours or more. Beef stock gets 48 hours or more. During the last half hour or so, I throw in the parsley.
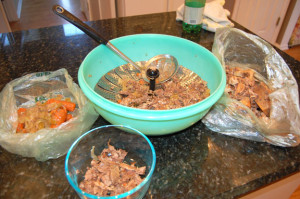
When the stock is done, I turn off the heat and let it cool for about half an hour. Then, using a slotted spoon, I remove as much of the vegetables, bones and meat as possible, placing them in a strainer over a large bowl (or a bowl with a steamer rack in the bottom).
Next I set up a few bowls so I can separate the vegetables (for composting), bits of meat (can be frozen for chicken salad; I feed the beef to my chickens) and bones (for the trash). You don’t have to go through this process, it’s just the way I do things.
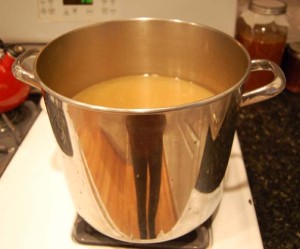
By the time the strainer is empty, there will be a puddle of more stock in the bottom of the bowl. I pour this into the big pot of stock, then pour the entire pot contents through a fine mesh strainer into another pot or bowl. If you want even the smallest bits of meat removed from your stock, line the strainer with cheesecloth or some other straining fabric (I prefer tea towels or cloth diapers).
At this time you can add salt and pepper to taste. I tend to go very easy on the salt, as I can always add more when I use the stock. With the beef stock, I will refrigerate the stock so the fat will rise to the top and solidify, which is easy to just lift off. This can be saved for cooking purposes. The chicken stock has a lot less fat, so I generally just mix it in well so when separating the stock into jars, they each get an equal amount.
Now the stock is ready to be put into containers for the freezer or to be pressure canned. I recommend using wide-mouth pint canning jars, that are freezer safe. More info can be found on my No More Canned Soup page. You’ll need to follow canning instructions to can your stock if you’re going that route.
Recipes for beef and chicken stock are below.
Beef Bone Broth / Stock
Ingredients
- 5 lbs beef bones (or mixed beef, lamb and pork)
- 2 large carrots large chunks
- 2 large celery sticks large chunks
- 1 large onion in chunks
- 6 cloves garlic no need to remove skins
- 4 sprigs thyme
- 2 leaves bay
- 1/4 cup vinegar apple cider is my favorite
- filtered water enough to cover the bones & vegs
- 1/2 bunch parsley w/stems
- salt & pepper to taste
Instructions
- Place all ingredients, except for parsley and salt & pepper, in a large stock pot.
- Heat to a light boil, then adjust the burner so the stock remains at a low simmer. Simmer for 48 hours or more, checking once in a while to make sure you're not losing water. Add more water if needed.
- Half an hour before the stock is done, add the parsley.
- Using a large slotted spoon, remove bones, meat and vegetables. Strain stock through a fine mesh sieve or cheese cloth if desired. Add salt & pepper.
- Let stock cool in refrigerator to solidify fat for removal. You can refrigerate the pot if you have room, or if you plan to freeze the stock, you can put the stock in jars and put them in the refrigerator.
- Remove fat from the top. Freeze jars or pressure can per your canner's instructions (this would entail reheating the stock).
Chicken Stock
Ingredients
- 3 lbs chicken bones See description above
- 2 large carrots large chunks
- 2 large celery stalks large chunks
- 1 large onion cut into chunks
- 6 cloves garlic no need to peel
- 2 tb vinegar apple cider is my favorite
- filtered water to cover
- 1/2 bunch parsley stems included
- salt & pepper to taste
Instructions
- Place all ingredients, except for parsley and salt & pepper, in a large stock pot.
- Heat to a light boil, then adjust the burner so the stock remains at a low simmer. Simmer for 24 hours or more, checking once in a while to make sure you're not losing water. Add more water if needed.
- Half an hour before the stock is done, add the parsley.
- Using a large slotted spoon, remove bones, meat and vegetables. Strain stock through a fine mesh sieve or cheese cloth if desired. Add salt & pepper.
- If you find it necessary, let stock cool in refrigerator to solidify fat for removal (chicken stock usually has less fat than beef). You can refrigerate the pot if you have room, or if you plan to freeze the stock, you can put the stock in jars and put them in the refrigerator. Otherwise...
- Freeze jars or pressure can per your canner's instructions (this would entail reheating the stock).


