
This is the “long” version of how to make kombucha. You can jump to the recipe “short” version below.
I use a two-ferment process to make kombucha. The first ferments a half gallon of plain sweet tea. You can drink that, but I prefer fermenting a second time, in smaller jars, for flavoring and carbonation. For the second ferment, you can use store-bought juices (I love the Naked Juice line), your own homemade juice or fruit chunks. I also love fresh lemon, orange and ginger slices. No need to peel them either.

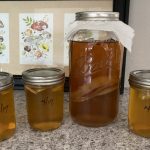
First ferment in the center, new batch on the right; pint jars for second ferment on the left.
For the two-ferment process you will need: A SCOBY, two half-gallon Ball jars, purified water, tea, sugar, 3-4 pint jars with lids. During the first ferment you can use a paper towel or coffee filter to cover the jar opening, secured with a metal or rubber band. For the pint jars/second ferment, you will need lids to hold the carbonation in, more sugar and your flavoring of choice.
First ferment:
Make tea in a half gallon Ball jar: Suspend tea bags by clipping them to the top of the jar (easy to remove when done steeping). Fill the jar with boiling water, at least to the 6 cup line, and steep for 15-20 minutes. Remove the tea, stir in 1/2 cup sugar, secure a paper towel over the opening and let tea cool to room temp. I usually let it sit on the counter until the next day. When cool, add the SCOBY to the jar and re-cover with a paper towel. Write the date on the jar with a Sharpie. You can let it sit for a week +/- in a cool, dark place. A pantry works. This will make 3-4 pints of kombucha, so if you drink a lot of kombucha you can make a batch every week and end up with 12-16 jars per month. Want even more? Your SCOBY will eventually multiply, so save the extras and get more half-gallon jars fermenting.
Second ferment:
After fermenting your first batch for a week, prepare a second jar of sweet tea same way as above, letting it cool to room temperature.
Once the new tea has cooled, transfer the SCOBY from the old fermented jar over the new sweet tea jar, add a splash of kombucha, write the date on the jar, cover top with a paper towel and band and set it aside to ferment for a week.
Put about 1 TB sugar in the bottom of the pint jars, add your fruit or juice of choice, about 3/4″-1″ deep. Pour the remaining fermented kombucha into the pint jars, cover with lids, write the date on them and let them ferment for a week. The longer they ferment, the more sour the taste. If you prefer that, let them ferment longer. The pints of kombucha will become carbonated and if you’re using metal lids those will bulge a little. When done fermenting, put the jars in the fridge, which will significantly slow down any additional fermentation. The kombucha will keep for weeks in the refrigerator and you may find them growing their own clear baby SCOBYs!
I’ve been doing this for more than ten years and have not had a bad batch. But keep in mind: if your kombucha (or anything else you make) looks or smells bad, throw it away and start over again!
Kombucha
Equipment
- 2 half-gallon Ball jars
- 4 pint Ball jars with lids
Ingredients
- 1 SCOBY
- 3-4 bags tea of your choice or 2-2.5 tsp loose leaf tea
- 6 cups boiling purified water
- 1/2 cup sugar for first ferment
- fruit, juice and more sugar for second ferment
Instructions
Step 1: First Ferment - Week 1
- Add your tea to half-gallon Ball jar. I recommend clipping the bag(s) to the side of the jar for easier removal when the tea is done.
- Pour in 6 cups boiling purified water; let steep for 15-20 minutes
- Remove tea; stir in 1/2 cup sugar; cover opening with paper towel & band; set aside to cool to room temperature.
- Add the SCOBY to cooled tea, replace the lid, write the date on the jar. Keep in cool dark place to ferment for a week.
Step 2: Second Ferment - Week 2
- Make a second jar of sweet tea following instructions for First Ferment.
- When this new tea reaches room temperature, move the SCOBY from the old jar to the new batch. Add a splash of kombucha.
- Fill pint jars with about 1 TB sugar and fruit or juice of your liking, about 3/4-1" deep.
- Pour equal amounts of the remaining fermented tea into the pint jars. You can add a little purified water to them to bring the levels up. Write the date on the jars, keep in a cool dark place to ferment for a week (or more if you prefer more sour).
Final Notes
- Repeat both Steps weekly for a 3-4 pint supply of kombucha. If you want to take a break, you can store your SCOBY in a jar of kombucha in the fridge for months.
- Your SCOBY will grow more layers over time —just separate and store the extras in a jar in the fridge. Or you can get an extra half-gallon of kombucha fermenting if you want more than 3-4 jars a week.

